To kick off my jump back into posting (here's where I apologize for being terrible about this for quite awhile now, but I promise, I've been busy!) I promised a "how-to" for the family-name sign I created for my cousin's (Mrs. Jahns!!) wedding shower. The last few months have been full of weddings and babies it seems, and rather than mail gift cards all over the country, it's much more fun (for me, anyways) to make things and pack them into big boxes. I have a few "catch-up" posts to write to get all of that up, and then I can move on to the fun things that my husband and I have been doing around the house that we just moved into. So, without further stalling, here it is.

Before- I picked up a cabinet door at our local Habitat for Humanity Re-store for about $5. Originally I wanted one that was a little more beat-up, but this one was in great shape, and the perfect canvas for text.

After finding a cabinet door, I measured the inner panel and created a document using Adobe Illustrator to match the size (though I'm sure Word would work fine...) I tweaked a little to get the text and embellishments laid out the way I wanted. Try a few different fonts, they change the style a lot!

Print your sign out, overlapping several pieces of paper if necessary. Make sure you like the way it looks and that the layout works well with the size of the door. Don't attach the paper yet...

When you're ready to get started, remove all of the old hardware and give the door a good scrub. Mine was a little dirty in the crevices, so I used soap and warm water to clean it up.
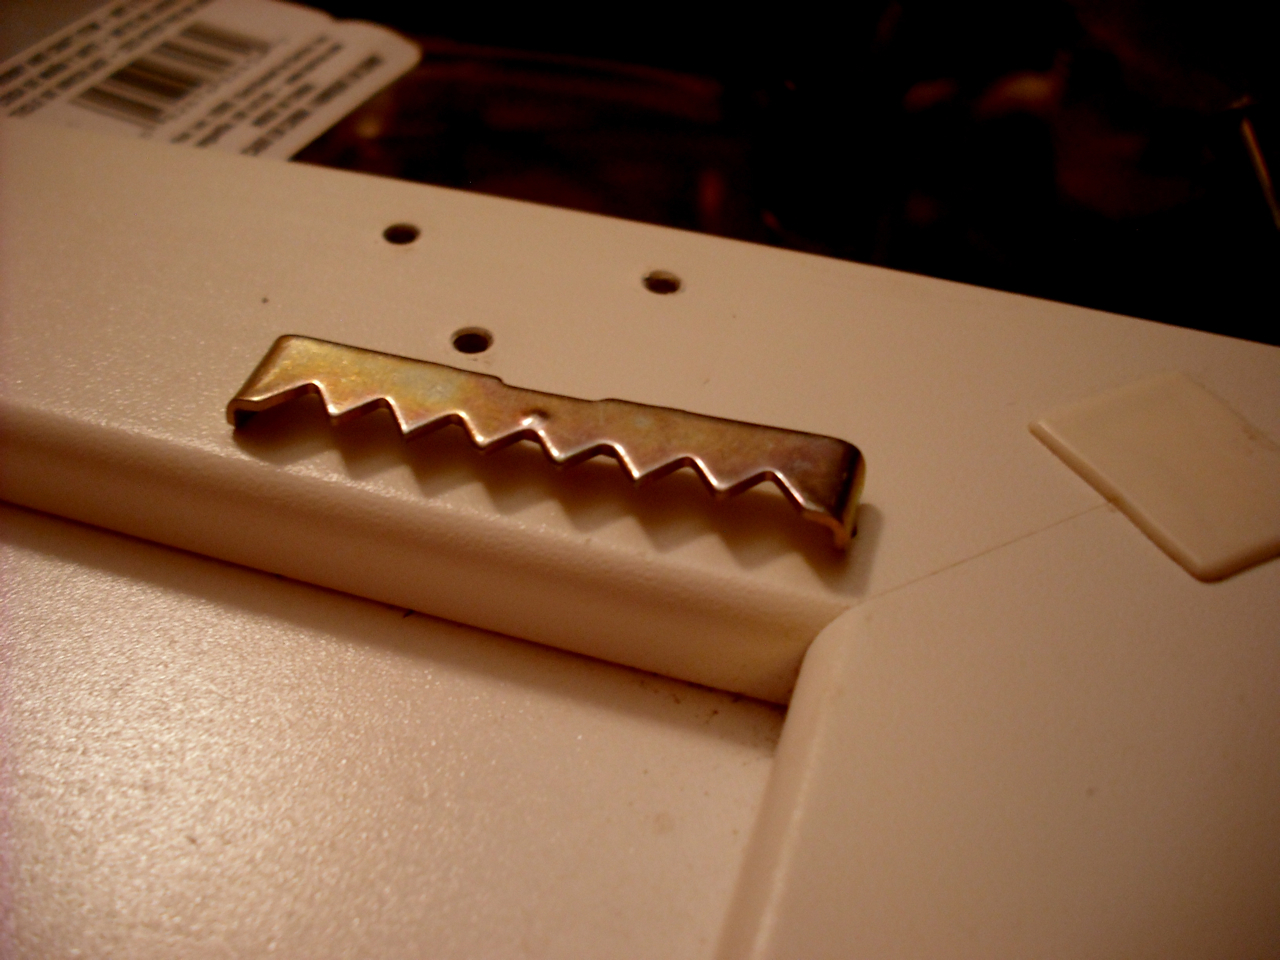
Attach picture hanging hardware on the back of the door. I used one of these jagged guys in each upper corner. They hammer in easily and they are very easy to get level. They also hold heavy things like cabinet doors well.
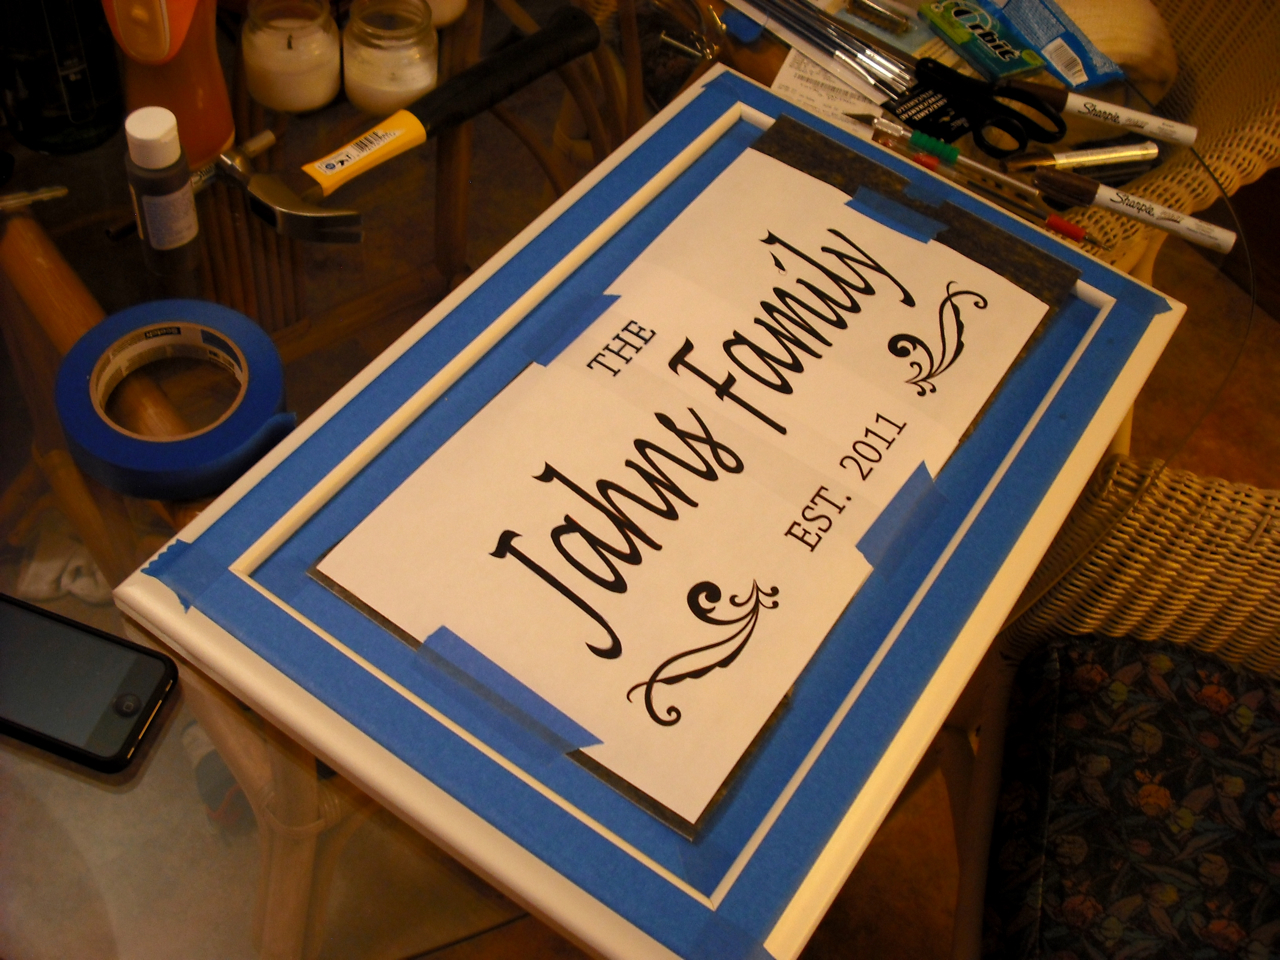
Flip your sign over. Trim a sheet of graphite paper to fit underneath your printed text. I taped off the sides first for the teal "frame" around the outside, then the graphite paper, then the text. Make sure that nothing is going to slip while you're working and that the graphite paper is the right side-down!

Carefully trace the outline of the text and anything else that you want to have on the door. I used a colored ball point pen so I could see what I had already traced. When you're finished, very carefully lift the paper off of the door. Make sure all the gaps in the trace are closed.

To paint, you can use brushes and craft paint, or anything that you like. I found Sharpie paint-pens in a ton of colors at Joann's Fabrics, and they were really easy to freehand with. Don't worry about covering all of the graphite or smearing it, after the paint dries you can clean it up with a pink pearl eraser and it won't hurt anything.

Let it dry overnight....

Mark the spots where you want to attach the new hardware. There are all sorts of things you could use for "hangers." Knobs, hooks, double hooks, etc... use your imagination! I left the handle on for a fun look. I liked that it still looked a little like a cabinet door, and I thought that it could maybe be used for a key hook or something... who knows!